It's been a while since I have posted any thing. I have been very busy with the family and work and did not have much time. Also babies are very time consuming. I will be posting about the ADC and the DAC for the Stm32 In a few weeks since things are finally starting to settle down.
STM32W
The ARM STM32 now has an affordable wireless family. It works on 802.11.4. This is the same as zigbee. A lot more external components are needed for it to work than you typical UC but its not too bad.
The team at Nomi Design are all ready doing some open source development for it. They have a PCB design for this Arm chip and are Porting Contiki as their RTOS (Real Time Operation System). Their final product is planed to be an arduino compatible or a standalone component that can send data threw ethernet, IVP4, IPV6, zigbee, mifi or what ever protocol you can think of. A cheap and sweet way to get your arduino wireless. If you want more details visit their web site http://nomidesign.net.
The beauty with these is that you should be able to port your current project over and they are now wireless. I will be working with these for the next little while. I will be posting articles on how to get it going as soon as I get it my self. I can post schematics, but the guys at Nomi Design would probably have a much better board.
If you want to read up on this ARM chip take a look at ST's website
http://www.st.com/internet/mcu/subclass/1377.jsp
Showing posts with label electronic. Show all posts
Showing posts with label electronic. Show all posts
Tuesday, August 9, 2011


Wednesday, March 9, 2011
My Evalbot First Steps: Hosting a webpage From a USB stick
So for starters this is a contiunation of a previous post my evalbot first steps Part 1. In this part though we will be mounting a usb flash drive to host our web page. Since the example provided does not work at all on the arm stellaris evalbot, we will be doing this from scratch except for the fat32 implementation. So load up the LWIP project and lets get started.
Changing the Interupts
So first thing we need to do is open our start up file it should be called something like startup_rvmdk.S. Now look for your interrupt vector. Look for the like DCD lwIPEthernetIntHandler ; Ethernet we will change that to DCD IpInterupt ; Ethernet Now look for the line that ends with ; USB0 it should be 2 lines lower. We will replace IntDefaultHandler with USB0HostIntHandler. What we are actually doing, is replacing the function that will get called when the interupt occurs to our own. USB0HostIntHandler All ready exist within the USB drivers in the Stellaris SDK. We are also replacing the Ethernet interrupt from the LWIP to our own. The reason we are doing that is because right now, when ever we receive data from the Ethernet we call the interrupt. Then we load the web page and send it back and we return to the normal execution. The problem with that, is the the USB driver uses interrupt as well. If we want to load data from the USB we can't be with in an interrupt routine because the USB will not interrupt the interrupt. Now we also need to tell our startup code that the functions actually do exists some where in the code. So scroll up just above the vector table and you should see an external deceleration section. Simply add these 2 lines of code:
EXTERN USB0HostIntHandler
EXTERN IpInterupt
Lets start by getting the #includes out of the way. You will need to add:
#include "usblib/usblib.h"
#include "usblib/usbmsc.h"
#include "usblib/host/usbhost.h"
#include "usblib/host/usbhmsc.h"
#include "driverlib/udma.h"
#include "fatfs/src/ff.h"
Next, you will need to add the USB lib to your project. simply double click on the libraries folder. It should open a file browse window. Navigate to the directory of the stellaris SDK/usblib/rvmdk. you will need to set the Files of type (at the bottom) to all files and add usblib.lib.
Now we need to add a bunch of stuff in our main(). You can put it in a function call initUSB() or something and call that from the main it might be cleaner but that's up to you. So I added my USB init after the SysTick setup (ROM_SysTickIntEnable();). The USB host for mast storage requires UDMA so first thing is to enable that. 3 simple lines should do it
ROM_SysCtlPeripheralEnable(SYSCTL_PERIPH_UDMA);
ROM_uDMAEnable();
ROM_uDMAControlBaseSet(g_sDMAControlTable);
You will also need to define a global variable:
tDMAControlTable g_sDMAControlTable[6] __attribute__ ((aligned(1024)));
Now we need to enable the USB hardware. The actually USB device is on GPIO portA. If you look at the schematic, we also need GPIO portB. This is used to indicate if we are Host mode or device mode. So lets enable the GPIO we will also enable the USB0 device.
ROM_SysCtlPeripheralEnable(SYSCTL_PERIPH_GPIOA);
ROM_SysCtlPeripheralEnable(SYSCTL_PERIPH_GPIOB);
ROM_SysCtlPeripheralEnable(SYSCTL_PERIPH_USB0);
Now lets set the chip to USB host mode.
ROM_GPIOPinTypeGPIOOutput(GPIO_PORTB_BASE, GPIO_PIN_0);
ROM_GPIOPinWrite(GPIO_PORTB_BASE, GPIO_PIN_0, 0);
Finally lets configure the USB data pin and let the Driver know what pin to use.
GPIOPinConfigure(GPIO_PA6_USB0EPEN);
ROM_GPIOPinTypeUSBDigital(GPIO_PORTA_BASE, GPIO_PIN_6);
Now we need to tell the SDK drive that we want to use the Mass storage driver. Keep note of where you are in your main. When we come back to it we will be adding code there. For now we will need to set a few things up. First we need to define a char buffer for the Host controller. 128 should be big enough. We also need a variable to store what USB is connected host or device. You can use this one if you ever switch between USB host or device. This will get changed in a call back. Nest we will define an enum to hold the different states the USB can be in. This way we know if its ready ect. Also, we need to declare the variable that will hold the instance of the driver. It MUST KEEP the same name as the fat implementation declares it as extern: g_ulMSCInstance . We also will declare an array of USB host drivers and associate our call back with the driver. Since we only wan the Mass storage driver, that is the only one we will put. Finally I will declare 3 functions used for call back. I will go more in details as we define them. Here are what my decelerations look like.
unsigned long g_ulMSCInstance = 0;
unsigned char hostControllerPool[128];
tUSBMode usbMode;
enum {
STATE_NO_DEVICE,
STATE_MSC_INIT,
STATE_MSC_CONNECTED,
STATE_UNKNOWN_DEVICE,
STATE_POWER_FAULT
} usb_state;
void USBEventCallback(void *eventData);
void ModeCallback(unsigned long ulIndex, tUSBMode eMode);
void MSCCallback(unsigned long ulInstance, unsigned long ulEvent, void *pvData);
//associate the call back
DECLARE_EVENT_DRIVER(USBEventHandler, 0, 0, USBEventCallback);
static tUSBHostClassDriver const * const UsbClassDrivers[] =
{
&g_USBHostMSCClassDriver,
&USBEventHandler
};
#define NUM_CLASS_DRIVERS (sizeof(UsbClassDrivers) / sizeof(*UsbClassDrivers))
Now we will define our call back functions. Let start with void USBEventCallback(void *eventData); This function is called at the lowest layer. It gets called every type a USB device is plugged in removed or has power fault. which ever the case we want to know what happen so our program know where we are.
void USBEventCallback(void *eventData)
{
tEventInfo *eventInfo;
eventInfo = (tEventInfo *)eventData;
switch(eventInfo->ulEvent) {
case USB_EVENT_CONNECTED:
usb_state = STATE_UNKNOWN_DEVICE;
break;
case USB_EVENT_DISCONNECTED:
usb_state = STATE_NO_DEVICE;
break;
case USB_EVENT_POWER_FAULT:
usb_state = STATE_POWER_FAULT;
break;
default:
break;
}
}
Next we got void ModeCallback(unsigned long ulIndex, tUSBMode eMode). this specifies if a USB Devices is connected or Host. Ill leave the switch but we don't really need it. It just there in case you want to add to it.
void ModeCallback(unsigned long ulIndex, tUSBMode eMode)
{
usbMode = eMode;
switch(eMode) {
case USB_MODE_HOST:
break;
case USB_MODE_DEVICE:
break;
case USB_MODE_NONE:
break;
default:
break;
}
}
Finally this last call back are event specific to the usb mass storage devices. This only gets called if we have a USB mass storage devices plunged in or unplugged. So if we detect a USB Mass storage, we will mount the file system. (we will only mount sda0 assuming there is only 1 partition.). The actual mounting will be done later for now lets just call our fs init code.
void MSCCallback(unsigned long ulInstance, unsigned long ulEvent, void *pvData)
{
switch(ulEvent)
{
case MSC_EVENT_OPEN:
{
usb_state = STATE_MSC_CONNECTED;
//Ensure we are still connects
USBHCDMain();
//wait for the device to be ready
while(USBHMSCDriveReady(g_ulMSCInstance))
{
//pause to not stress out the device
SysCtlDelay(SysCtlClockGet()/30);
}
fs_init();
break;
case MSC_EVENT_CLOSE:
//should probably unnount the partition.
usb_state = STATE_NO_DEVICE;
break;
default:
break;
}
}
Now lets go back to the main. We will need to add the code to start up the USB host driver. Initialise the USB to not connected and tell the driver that we will be using USB host only.
usb_state = STATE_NO_DEVICE;
USBStackModeSet(0, USB_MODE_HOST, ModeCallback);
Next we need to the the USB host driver, what kind of Host device can we connect. This is where we pass our array of drivers.
USBHCDRegisterDrivers(0, UsbClassDrivers, NUM_CLASS_DRIVERS);
Finally, lest start a instance of the USB mass storage driver, give the USB power and Start the USB Host controller.
//start a MSC USB HOST
g_ulMSCInstance = USBHMSCDriveOpen(0, MSCCallback);
//give the usb some power
USBHCDPowerConfigInit(0, USBHCD_VBUS_AUTO_HIGH | USBHCD_VBUS_FILTER);
//USBOTGModeInit(0, 2000, g_pHCDPool, HCD_MEMORY_SIZE);
USBHCDInit(0, g_pHCDPool2, HCD_MEMORY_SIZE); //dcm
At the end of you main there should be a infinite loop. insert USBHCDMain(); in that loop.
Now the USB should be up and running. Now we need to read from the USB when we load a web page.
int IPInterupted = 0;
int InitDone = 0;
Now we will add our interrupt function. If we are still initializing stuff, then lets simply handle the interrupt in our interrupt request. IF we are done the init, then set the flag so we can handle it in our main execution and free up the interrupts. we will also disable the Ethernet interrupt until we have dealt with this one.
void IpInterupt(void)
{
if(InitDone)
{
IPInterupted = 1;
EthernetIntDisable(ETH_BASE, ETH_INT_RX | ETH_INT_TX);
}
else
{
lwIPEthernetIntHandler();
}
}
Now back to the main. Right before we enter the infinite loop, we will add InitDone = 1; This way our interrupt know not to handle it but flag to let us know it happened and let us deal with the interrupt. Now in the infinite loops we need to add code to handle the interrupt is if occurs and re-enable the Ethernet interrupt once we have dealt with it. Here is what my infinite loop looks like.
InitDone = 1;
while(1)
{
if(IPInterupted)
{
lwIPEthernetIntHandler();
EthernetIntEnable(ETH_BASE, ETH_INT_RX | ETH_INT_TX);
}
USBHCDMain();
}
Now that the files are loaded we are ready to read out htm files from the USB. So lets open the lmi_fs.c file. This files contains the function that httd will call to open the web pages. we will simple add the calls to read the USB here. Before we start modifying code, we need to add a couble of global variables:
FATFS g_sFatFs;
extern enum {
STATE_NO_DEVICE,
STATE_MSC_INIT,
STATE_MSC_CONNECTED,
STATE_UNKNOWN_DEVICE,
STATE_POWER_FAULT
} usb_state;
and include
#include "fatfs/src/ff.h".
Let start with fs_init(). If you remember we call that when we detect a USB key plugged in. In this code, we will need to mount the file system. We only want to mount it though if we have a USB connected.
void fs_init(void)
{
FIL sFileObject;
if(usb_state == STATE_MSC_CONNECTED)
{
f_mount(0, &g_sFatFs);
}
}
Now we want to be able to open the USB files. Lets head over to fs_open(char *name). Right after we allocate the memory for ptFile and check if its not null, we will add our code. we want to return ptFile with and open fat file in the struct and only if we have a USB connected. I left the rest of the code there. That way if the USB is not connected, we will open the default web page. I don't do error handling yet that is left as an exercise for you. Here is a snippet of my code:
if(usb_state == STATE_MSC_CONNECTED)
{
if(f_open(&ptFile->sFileObject, name, FA_READ) != FR_OK)
{
}
return ptFile;
}
In Order to have this working though we will need to add to the struct. So lets open fs.h. If you Are in the project explorer, and you click the + sign next to the lmi_fs, you should see a list of included files. double click on FS.h you should add the include #include "fatfs/src/ff.h" and add FIL sFileObject to the struct. Here is what my struct looks like:
#ifndef __FS_H__
#define __FS_H__
#include "fatfs/src/ff.h"
struct fs_file {
char *data;
int len;
int index;
void *pextension;
FIL sFileObject
};
Now back to lmi_fs.c. We need to implement the read function. This function would return -1 if no more data is left if not it returns the number of bytes read. Again I left the rest of the code there so I can still serve web pages if no usb is connects. here is what my read code looks like:
if(usb_state == STATE_MSC_CONNECTED)
{
f_read(&file->sFileObject, buffer,count,&usBytesRead);
if(!usBytesRead)
{
//no data left
f_close(&file->sFileObject);
return -1;
}
return usBytesRead;
}
And there you go. you should be able to serve web pages from your arm stellaris evalbot by loading the pages from USB. If its not working, I might have forgotten a step. Please let me know and Ill fix it. Also if you see any improvements thanks.
Changing the Interupts
So first thing we need to do is open our start up file it should be called something like startup_rvmdk.S. Now look for your interrupt vector. Look for the like DCD lwIPEthernetIntHandler ; Ethernet we will change that to DCD IpInterupt ; Ethernet Now look for the line that ends with ; USB0 it should be 2 lines lower. We will replace IntDefaultHandler with USB0HostIntHandler. What we are actually doing, is replacing the function that will get called when the interupt occurs to our own. USB0HostIntHandler All ready exist within the USB drivers in the Stellaris SDK. We are also replacing the Ethernet interrupt from the LWIP to our own. The reason we are doing that is because right now, when ever we receive data from the Ethernet we call the interrupt. Then we load the web page and send it back and we return to the normal execution. The problem with that, is the the USB driver uses interrupt as well. If we want to load data from the USB we can't be with in an interrupt routine because the USB will not interrupt the interrupt. Now we also need to tell our startup code that the functions actually do exists some where in the code. So scroll up just above the vector table and you should see an external deceleration section. Simply add these 2 lines of code:
EXTERN USB0HostIntHandler
EXTERN IpInterupt
Getting the USB working
Lets start by getting the #includes out of the way. You will need to add:
#include "usblib/usblib.h"
#include "usblib/usbmsc.h"
#include "usblib/host/usbhost.h"
#include "usblib/host/usbhmsc.h"
#include "driverlib/udma.h"
#include "fatfs/src/ff.h"
Next, you will need to add the USB lib to your project. simply double click on the libraries folder. It should open a file browse window. Navigate to the directory of the stellaris SDK/usblib/rvmdk. you will need to set the Files of type (at the bottom) to all files and add usblib.lib.
Now we need to add a bunch of stuff in our main(). You can put it in a function call initUSB() or something and call that from the main it might be cleaner but that's up to you. So I added my USB init after the SysTick setup (ROM_SysTickIntEnable();). The USB host for mast storage requires UDMA so first thing is to enable that. 3 simple lines should do it
ROM_SysCtlPeripheralEnable(SYSCTL_PERIPH_UDMA);
ROM_uDMAEnable();
ROM_uDMAControlBaseSet(g_sDMAControlTable);
You will also need to define a global variable:
tDMAControlTable g_sDMAControlTable[6] __attribute__ ((aligned(1024)));
Now we need to enable the USB hardware. The actually USB device is on GPIO portA. If you look at the schematic, we also need GPIO portB. This is used to indicate if we are Host mode or device mode. So lets enable the GPIO we will also enable the USB0 device.
ROM_SysCtlPeripheralEnable(SYSCTL_PERIPH_GPIOA);
ROM_SysCtlPeripheralEnable(SYSCTL_PERIPH_GPIOB);
ROM_SysCtlPeripheralEnable(SYSCTL_PERIPH_USB0);
Now lets set the chip to USB host mode.
ROM_GPIOPinTypeGPIOOutput(GPIO_PORTB_BASE, GPIO_PIN_0);
ROM_GPIOPinWrite(GPIO_PORTB_BASE, GPIO_PIN_0, 0);
Finally lets configure the USB data pin and let the Driver know what pin to use.
GPIOPinConfigure(GPIO_PA6_USB0EPEN);
ROM_GPIOPinTypeUSBDigital(GPIO_PORTA_BASE, GPIO_PIN_6);
Now we need to tell the SDK drive that we want to use the Mass storage driver. Keep note of where you are in your main. When we come back to it we will be adding code there. For now we will need to set a few things up. First we need to define a char buffer for the Host controller. 128 should be big enough. We also need a variable to store what USB is connected host or device. You can use this one if you ever switch between USB host or device. This will get changed in a call back. Nest we will define an enum to hold the different states the USB can be in. This way we know if its ready ect. Also, we need to declare the variable that will hold the instance of the driver. It MUST KEEP the same name as the fat implementation declares it as extern: g_ulMSCInstance . We also will declare an array of USB host drivers and associate our call back with the driver. Since we only wan the Mass storage driver, that is the only one we will put. Finally I will declare 3 functions used for call back. I will go more in details as we define them. Here are what my decelerations look like.
unsigned long g_ulMSCInstance = 0;
unsigned char hostControllerPool[128];
tUSBMode usbMode;
enum {
STATE_NO_DEVICE,
STATE_MSC_INIT,
STATE_MSC_CONNECTED,
STATE_UNKNOWN_DEVICE,
STATE_POWER_FAULT
} usb_state;
void USBEventCallback(void *eventData);
void ModeCallback(unsigned long ulIndex, tUSBMode eMode);
void MSCCallback(unsigned long ulInstance, unsigned long ulEvent, void *pvData);
//associate the call back
DECLARE_EVENT_DRIVER(USBEventHandler, 0, 0, USBEventCallback);
static tUSBHostClassDriver const * const UsbClassDrivers[] =
{
&g_USBHostMSCClassDriver,
&USBEventHandler
};
#define NUM_CLASS_DRIVERS (sizeof(UsbClassDrivers) / sizeof(*UsbClassDrivers))
Now we will define our call back functions. Let start with void USBEventCallback(void *eventData); This function is called at the lowest layer. It gets called every type a USB device is plugged in removed or has power fault. which ever the case we want to know what happen so our program know where we are.
void USBEventCallback(void *eventData)
{
tEventInfo *eventInfo;
eventInfo = (tEventInfo *)eventData;
switch(eventInfo->ulEvent) {
case USB_EVENT_CONNECTED:
usb_state = STATE_UNKNOWN_DEVICE;
break;
case USB_EVENT_DISCONNECTED:
usb_state = STATE_NO_DEVICE;
break;
case USB_EVENT_POWER_FAULT:
usb_state = STATE_POWER_FAULT;
break;
default:
break;
}
}
Next we got void ModeCallback(unsigned long ulIndex, tUSBMode eMode). this specifies if a USB Devices is connected or Host. Ill leave the switch but we don't really need it. It just there in case you want to add to it.
void ModeCallback(unsigned long ulIndex, tUSBMode eMode)
{
usbMode = eMode;
switch(eMode) {
case USB_MODE_HOST:
break;
case USB_MODE_DEVICE:
break;
case USB_MODE_NONE:
break;
default:
break;
}
}
Finally this last call back are event specific to the usb mass storage devices. This only gets called if we have a USB mass storage devices plunged in or unplugged. So if we detect a USB Mass storage, we will mount the file system. (we will only mount sda0 assuming there is only 1 partition.). The actual mounting will be done later for now lets just call our fs init code.
void MSCCallback(unsigned long ulInstance, unsigned long ulEvent, void *pvData)
{
switch(ulEvent)
{
case MSC_EVENT_OPEN:
{
usb_state = STATE_MSC_CONNECTED;
//Ensure we are still connects
USBHCDMain();
//wait for the device to be ready
while(USBHMSCDriveReady(g_ulMSCInstance))
{
//pause to not stress out the device
SysCtlDelay(SysCtlClockGet()/30);
}
fs_init();
break;
case MSC_EVENT_CLOSE:
//should probably unnount the partition.
usb_state = STATE_NO_DEVICE;
break;
default:
break;
}
}
Now lets go back to the main. We will need to add the code to start up the USB host driver. Initialise the USB to not connected and tell the driver that we will be using USB host only.
usb_state = STATE_NO_DEVICE;
USBStackModeSet(0, USB_MODE_HOST, ModeCallback);
Next we need to the the USB host driver, what kind of Host device can we connect. This is where we pass our array of drivers.
USBHCDRegisterDrivers(0, UsbClassDrivers, NUM_CLASS_DRIVERS);
Finally, lest start a instance of the USB mass storage driver, give the USB power and Start the USB Host controller.
//start a MSC USB HOST
g_ulMSCInstance = USBHMSCDriveOpen(0, MSCCallback);
//give the usb some power
USBHCDPowerConfigInit(0, USBHCD_VBUS_AUTO_HIGH | USBHCD_VBUS_FILTER);
//USBOTGModeInit(0, 2000, g_pHCDPool, HCD_MEMORY_SIZE);
USBHCDInit(0, g_pHCDPool2, HCD_MEMORY_SIZE); //dcm
At the end of you main there should be a infinite loop. insert USBHCDMain(); in that loop.
Now the USB should be up and running. Now we need to read from the USB when we load a web page.
Breaking Out Of The Interrupt Request
Let's start with handelling the Ethernet in our main rather than in a interrupt request. Lest start by declaring 2 global variables. IPInterupted is a flag that we will use to indicate we received a Interrupt and InitDone is a flag to tell us that we have finished the init and we and now in our endless loop in our main.int IPInterupted = 0;
int InitDone = 0;
Now we will add our interrupt function. If we are still initializing stuff, then lets simply handle the interrupt in our interrupt request. IF we are done the init, then set the flag so we can handle it in our main execution and free up the interrupts. we will also disable the Ethernet interrupt until we have dealt with this one.
void IpInterupt(void)
{
if(InitDone)
{
IPInterupted = 1;
EthernetIntDisable(ETH_BASE, ETH_INT_RX | ETH_INT_TX);
}
else
{
lwIPEthernetIntHandler();
}
}
Now back to the main. Right before we enter the infinite loop, we will add InitDone = 1; This way our interrupt know not to handle it but flag to let us know it happened and let us deal with the interrupt. Now in the infinite loops we need to add code to handle the interrupt is if occurs and re-enable the Ethernet interrupt once we have dealt with it. Here is what my infinite loop looks like.
InitDone = 1;
while(1)
{
if(IPInterupted)
{
lwIPEthernetIntHandler();
EthernetIntEnable(ETH_BASE, ETH_INT_RX | ETH_INT_TX);
}
USBHCDMain();
}
Loading A Page From USB
We will need to add 2 files to our 3rd Party folder. ff.c and fat_usbmsc.c. So double click the 3rparty folder. Navigate to the folder the stellaris SDK/third_party/fatfs/port and add the file "fat_usbmsc.c". Now go back one folder go in src, and add the file ff.c.Now that the files are loaded we are ready to read out htm files from the USB. So lets open the lmi_fs.c file. This files contains the function that httd will call to open the web pages. we will simple add the calls to read the USB here. Before we start modifying code, we need to add a couble of global variables:
FATFS g_sFatFs;
extern enum {
STATE_NO_DEVICE,
STATE_MSC_INIT,
STATE_MSC_CONNECTED,
STATE_UNKNOWN_DEVICE,
STATE_POWER_FAULT
} usb_state;
and include
#include "fatfs/src/ff.h".
Let start with fs_init(). If you remember we call that when we detect a USB key plugged in. In this code, we will need to mount the file system. We only want to mount it though if we have a USB connected.
void fs_init(void)
{
FIL sFileObject;
if(usb_state == STATE_MSC_CONNECTED)
{
f_mount(0, &g_sFatFs);
}
}
Now we want to be able to open the USB files. Lets head over to fs_open(char *name). Right after we allocate the memory for ptFile and check if its not null, we will add our code. we want to return ptFile with and open fat file in the struct and only if we have a USB connected. I left the rest of the code there. That way if the USB is not connected, we will open the default web page. I don't do error handling yet that is left as an exercise for you. Here is a snippet of my code:
if(usb_state == STATE_MSC_CONNECTED)
{
if(f_open(&ptFile->sFileObject, name, FA_READ) != FR_OK)
{
}
return ptFile;
}
In Order to have this working though we will need to add to the struct. So lets open fs.h. If you Are in the project explorer, and you click the + sign next to the lmi_fs, you should see a list of included files. double click on FS.h you should add the include #include "fatfs/src/ff.h" and add FIL sFileObject to the struct. Here is what my struct looks like:
#ifndef __FS_H__
#define __FS_H__
#include "fatfs/src/ff.h"
struct fs_file {
char *data;
int len;
int index;
void *pextension;
FIL sFileObject
};
Now back to lmi_fs.c. We need to implement the read function. This function would return -1 if no more data is left if not it returns the number of bytes read. Again I left the rest of the code there so I can still serve web pages if no usb is connects. here is what my read code looks like:
if(usb_state == STATE_MSC_CONNECTED)
{
f_read(&file->sFileObject, buffer,count,&usBytesRead);
if(!usBytesRead)
{
//no data left
f_close(&file->sFileObject);
return -1;
}
return usBytesRead;
}
And there you go. you should be able to serve web pages from your arm stellaris evalbot by loading the pages from USB. If its not working, I might have forgotten a step. Please let me know and Ill fix it. Also if you see any improvements thanks.
Wednesday, February 16, 2011
Keil and non-commercial license
So Keil is trying to develop a non-commercial license. I don't have any details yet. Just thought I would give a heads up. If you want more info contact their sales office. It might also show that there is interest in this.
sales.us (at) keil.com
sales.us (at) keil.com
Tuesday, February 1, 2011
Forwarding the serial port to the net
This section will discus reading the serial port and forwarding the content to a socket and vise versa in C++. I will be using specific api from win32 so it will not build in linux. If I ever see interest on getting it working on linux, I will write one for linux. I will only cover briefly the socket information since there are so many in depth tutorials out there.
For starters we will need to create a new visual studio console application project. This is pretty basic and could be different from version so I will assume you can do this on your own. I will be using visual studio 2010
Now that we have our applications, we need to include the following.
we also need to include the lib file so the linker knows where to get the functions from.
simply add #pragma comment(lib, "Ws2_32.lib") after all your includes
Setting up the the socket
the first thing we need to add before using any winsoc, is WSAStartup. It takes a version number as a parameter (we are using version 2) and a struct that will be use by its internals.
read more
read more
The inet_addr function converts an IP string to a long used by winsock.
read more
and the htons converts the windows byte order to the network byte order as some system have different byte orders.
read more
memset(&addrInfo,0,sizeof(sockaddr_in));
addrInfo.sin_family = AF_INET;
addrInfo.sin_port = htons(80); /http port
addrInfo.sin_addr.S_un.S_addr = inet_addr("74.125.226.81"); //Google's IP adress
Now that we have all our information we need to create the socket and connect it.
we create the socket with the socket function. This function takes 3 parameters.
First we specify that the address is a IPv4 adress, we what stream socket (goes in hand with tcp) as opposed to a data gram and we want to use TCP protocol.
read more
The connect takes the newly created socket and the addrInfo we created just 1 step before.
if (connect(hSocket, (sockaddr*)(&addrInfo), sizeof(addrInfo))!=0)
{
EXIT("can't connect\n");
}
Finaly I added this line so that when I read from the socket it does not block untill data is received
Setting up the Serial port
We will open the serialport using the function CreateFile. The file that we will use is COM# where the # is the number of the comport. For now I will use COM1. We will also be using a struct called DCB. This struct contains information about the serial port configurations that we will use. Note that these settings must match with those used with you STM32 Discovery
read more
We will also use the function SetCommState. This function simply applies the new settings.
read more
The Loop
Now we simply need to read from the serial port and send it to the net and then read from the net and send it to the serial port. We will use ReadFile and WriteFile to read an write to the serial port. We will pass the following parameter. the handle to the Serial port, the pointer to the buffer, the size of the buffer or the content and the address to a variable that will contain the number of bytes sent or read. we set the last parameter to null since it only used if you need to share access to the file and we don't.
We will be using recv and send to read and write to our socket. These functions take similar parameters except instead of passing the adress to a variable to know how many byte were read or sent, it is return.
here is my loop
now if you run this and you run your STM32 Dsicovery, what ever you send to serial will then be sent to (google in this example) the net. Try doing a http get and get this page?
Next I will be posting on how to get HTTPS working on the stm32 Discover using this as your connection.
I will also discuss what else you can use to connect to the internet
For starters we will need to create a new visual studio console application project. This is pretty basic and could be different from version so I will assume you can do this on your own. I will be using visual studio 2010
Now that we have our applications, we need to include the following.
#include <stdio.h>
#include <winsock.h>
#include <Windows.h>
I read that some people have trouble with the linker depending on the order of the include. This order worked for me. I also put the includes in my precompiled header (stdafx.h).#include <winsock.h>
#include <Windows.h>
we also need to include the lib file so the linker knows where to get the functions from.
simply add #pragma comment(lib, "Ws2_32.lib") after all your includes
Setting up the the socket
the first thing we need to add before using any winsoc, is WSAStartup. It takes a version number as a parameter (we are using version 2) and a struct that will be use by its internals.
read more
WSAData wsaData;
if ( WSAStartup(MAKEWORD(2,0), &wsaData))
{
printf("could not load WSAStratup");
return -1;
}
Now we need to prepare our connection information. We will use the sockaddr_in to store all the information needed for the socket. There are a couple different types of sockaddr but for IPv4 sockaddr_in is the one we use. read more
The inet_addr function converts an IP string to a long used by winsock.
read more
and the htons converts the windows byte order to the network byte order as some system have different byte orders.
read more
SOCKET hSocket;
sockaddr_in addrInfo;memset(&addrInfo,0,sizeof(sockaddr_in));
addrInfo.sin_family = AF_INET;
addrInfo.sin_port = htons(80); /http port
addrInfo.sin_addr.S_un.S_addr = inet_addr("74.125.226.81"); //Google's IP adress
Now that we have all our information we need to create the socket and connect it.
we create the socket with the socket function. This function takes 3 parameters.
First we specify that the address is a IPv4 adress, we what stream socket (goes in hand with tcp) as opposed to a data gram and we want to use TCP protocol.
read more
The connect takes the newly created socket and the addrInfo we created just 1 step before.
hSocket = socket(AF_INET, SOCK_STREAM, IPPROTO_TCP);
if (hSocket==INVALID_SOCKET)
{
EXIT("can't create Socket\n");
}EXIT("can't create Socket\n");
if (connect(hSocket, (sockaddr*)(&addrInfo), sizeof(addrInfo))!=0)
{
EXIT("can't connect\n");
}
Finaly I added this line so that when I read from the socket it does not block untill data is received
ioctlsocket(hSocket,FIONBIO,&timeout);
Setting up the Serial port
We will open the serialport using the function CreateFile. The file that we will use is COM# where the # is the number of the comport. For now I will use COM1. We will also be using a struct called DCB. This struct contains information about the serial port configurations that we will use. Note that these settings must match with those used with you STM32 Discovery
read more
We will also use the function SetCommState. This function simply applies the new settings.
read more
HANDLE hSerial;
hSerial = CreateFile("COM1", GENERIC_READ | GENERIC_WRITE, 0, 0, OPEN_EXISTING, FILE_ATTRIBUTE_NORMAL, 0);
//Comm settings
DCB serialInfo = {0};
serialInfo.DCBlength=sizeof(serialInfo);
serialInfo.BaudRate=CBR_14400;
serialInfo.ByteSize=8;
serialInfo.StopBits=ONESTOPBIT;
serialInfo.Parity=NOPARITY;
SetCommState(hSerial, &serialInfo);
serialInfo.BaudRate=CBR_14400;
serialInfo.ByteSize=8;
serialInfo.StopBits=ONESTOPBIT;
serialInfo.Parity=NOPARITY;
SetCommState(hSerial, &serialInfo);
The Loop
Now we simply need to read from the serial port and send it to the net and then read from the net and send it to the serial port. We will use ReadFile and WriteFile to read an write to the serial port. We will pass the following parameter. the handle to the Serial port, the pointer to the buffer, the size of the buffer or the content and the address to a variable that will contain the number of bytes sent or read. we set the last parameter to null since it only used if you need to share access to the file and we don't.
We will be using recv and send to read and write to our socket. These functions take similar parameters except instead of passing the adress to a variable to know how many byte were read or sent, it is return.
here is my loop
char* readbuffer = new char[READ_BUFFER_SIZE];
char* writebuffer = new char[BUFFER_2_SIZE];
DWORD readlen = 0, bytesLeft = READ_BUFFER_SIZE;
int writelen = 0;
do
{
//reset the variables
readlen = 0;
writelen = 0;
//read data from serial port
ReadFile(hSerial,readbuffer,READ_BUFFER_SIZE,&readlen,0);
//was there actual data read?
if(readlen)
{
//send the bytes to the serial port
bytesLeft = readlen;
while(bytesLeft)
{
//did we send all the byte?
bytesLeft -= send(hSocket,readbuffer+(readlen - bytesLeft),bytesLeft,0);
}
}
//read the data from the net
writelen = recv(hSocket,writebuffer,WRITE_BUFFER_SIZE,0);
//did we receive any thing?
if(writelen>0)
{
bytesLeft = writelen;
while(bytesLeft) //did we send every thing to the serial port?
{
DWORD byteSent = 0;
//send to the serial port
WriteFile(hSerial,writebuffer + (writelen - bytesLeft),bytesLeft,&byteSent,0);
bytesLeft -= byteSent;
}
}
else if(writelen < 0)
{
//we go an error we can ignore it if err == WSAEWOULDBLOCK
long err = WSAGetLastError ();
}
if(writelen > 0 && readlen == 0)
{
Sleep(100);
}
}while(writelen); // the socket is closed
now if you run this and you run your STM32 Dsicovery, what ever you send to serial will then be sent to (google in this example) the net. Try doing a http get and get this page?
Next I will be posting on how to get HTTPS working on the stm32 Discover using this as your connection.
I will also discuss what else you can use to connect to the internet
Monday, January 31, 2011
STM32 Discovery: The Basics - Buffering the USART and Error Handling
So this part is mostly coding a linked list. probably not the most efficient linked list either but it servers its purpose does not have much over head too. The code also does not do checks if pointer is null and such and assumes you will be able to add that. The code has room for improvement but this is to give a basic idea.
so I created 2 files urat.h and uart.c. I will not describe adding the function signatures in the header and assume you will do that.
we will first need to declare out struct for the linked list.
We also nee a couple global variables
//a pointer to the buffer we are currently reading from
extern LinkedReadWriteBuffer* receiveReadBuffer;
//the pointer to the buffer we are writing to
extern LinkedReadWriteBuffer* receiveWriteBuffer;
We will define these variables in uart.c
now in our main we will need to instantiate those variables
now we are ready to tackle uart.c
The first function we need to define is initRWBuff() this function will initialize a buffer to its default values.
here is what mine looks like
void initRWBuff(ReadWriteBuffer * tmpBuff)
{
tmpBuff->buffer = (int*)malloc( sizeof(int) * tmpBuff->size);
if(!tmpBuff->buffer)
{
HardFault_Handler();
}
tmpBuff->writeAt = 0 ;
tmpBuff->readAt = 0 ;
}
So now we need to write the the buffer every time we receive a byte from our interrupt routine. Basicalyy we will read the char we are receiving and insert it into the buffer. we will increment our counter of where the last byte was written. If the buffer if full, we will create a new buffer to write in the next time. It would probably be more efficent to have it create the buffer only one we need to use it.
Here is what my routine looks like
here is what it looks like:
int jm_recv(void* uart, unsigned char * buff, int size)
{
int i=0;
for(;i<size && receiveReadBuffer->buffer.readAt < receiveReadBuffer->buffer.writeAt;i++)
{
buff[i] = (char) receiveReadBuffer->buffer.buffer[receiveReadBuffer->buffer.readAt];
receiveReadBuffer->buffer.readAt++;
if(receiveReadBuffer->buffer.readAt == receiveReadBuffer->buffer.size)
{
if(receiveReadBuffer->next)
{
LinkedReadWriteBuffer* p = receiveReadBuffer;
receiveReadBuffer = receiveReadBuffer->next;
free(p->buffer.buffer);
free(p);
}
}
}
return i;
}
if you want o wrap SendByte with a similar signature. here what I did.
now for simple error handling we just need to override the error functions we want to handle. similar to our IRQ. I simply Added this under the main.
void HardFault_Handler(void)
{
int error = 0;
while(1);
}
Eventually I will make it reboot the device. a few more error functions you can override are
DCD HardFault_Handler ; Hard Fault Handler
DCD MemManage_Handler ; MPU Fault Handler
DCD BusFault_Handler ; Bus Fault Handler
DCD UsageFault_Handler ; Usage Fault Handler
You can see the list in STM32F10x.s
Finlay you might want a larger stack then the default. the stm32 Discovery has 92kb of ram. I set my stack to half of that. Open up STM32F10x.s and click the Configuration Wizard at the bottom. open the stack Configuration and increase the Stack size. I set mine to 0x14000.
The next post will cover using the usart to connect to a pc that will then connect to the internet. I will also suggest other ways to connect to the internet with out the PC
so I created 2 files urat.h and uart.c. I will not describe adding the function signatures in the header and assume you will do that.
we will first need to declare out struct for the linked list.
#define READ_BUFF_SIZE 1024
//structs
typedef struct ReadWriteBufferStruct
{
int size;
int readAt; //the next byte to read
int writeAt; //the next byte to write
int* buffer;
}ReadWriteBuffer ;
typedef struct LinkedReadWriteBufferStruct
{
struct LinkedReadWriteBufferStruct* next;
ReadWriteBuffer buffer;
}LinkedReadWriteBuffer ;
We also nee a couple global variables
//a pointer to the buffer we are currently reading from
extern LinkedReadWriteBuffer* receiveReadBuffer;
//the pointer to the buffer we are writing to
extern LinkedReadWriteBuffer* receiveWriteBuffer;
We will define these variables in uart.c
now in our main we will need to instantiate those variables
receiveReadBuffer = (LinkedReadWriteBuffer*) malloc(sizeof(LinkedReadWriteBuffer) ) ;
receiveWriteBuffer = receiveReadBuffer;
receiveReadBuffer->buffer.size = READ_BUFF_SIZE;
receiveWriteBuffer = receiveReadBuffer;
receiveReadBuffer->buffer.size = READ_BUFF_SIZE;
initRWBuff(&(receiveReadBuffer->buffer));
now we are ready to tackle uart.c
The first function we need to define is initRWBuff() this function will initialize a buffer to its default values.
here is what mine looks like
void initRWBuff(ReadWriteBuffer * tmpBuff)
{
tmpBuff->buffer = (int*)malloc( sizeof(int) * tmpBuff->size);
if(!tmpBuff->buffer)
{
HardFault_Handler();
}
tmpBuff->writeAt = 0 ;
tmpBuff->readAt = 0 ;
}
So now we need to write the the buffer every time we receive a byte from our interrupt routine. Basicalyy we will read the char we are receiving and insert it into the buffer. we will increment our counter of where the last byte was written. If the buffer if full, we will create a new buffer to write in the next time. It would probably be more efficent to have it create the buffer only one we need to use it.
Here is what my routine looks like
void USART1_IRQHandler (void)
{
volatile unsigned int IIR;
IIR = USART1->SR;
if (IIR & USART_FLAG_RXNE) // read interrupt
{
USART1->SR &= ~USART_FLAG_RXNE; // clear interrupt
receiveWriteBuffer->buffer.buffer[receiveWriteBuffer->buffer.writeAt] = (USART1->DR & 0x1FF);
receiveWriteBuffer->buffer.writeAt++;
if(receiveWriteBuffer->buffer.writeAt == receiveWriteBuffer->buffer.size)
{
LinkedReadWriteBuffer* tmpBuff;
tmpBuff = (LinkedReadWriteBuffer*) malloc(sizeof(LinkedReadWriteBuffer) ) ;
if(!tmpBuff)
{
HardFault_Handler();
}
tmpBuff->buffer.size = READ_BUFF_SIZE;
if(!tmpBuff->buffer.size)
{
HardFault_Handler();
}
tmpBuff->next = 0 ;
initRWBuff(&(tmpBuff->buffer));
receiveWriteBuffer->next = tmpBuff;
receiveWriteBuffer = tmpBuff;
}
}
}
now we need to create a function that will read the buffer and skip to the next one when we get to the end. I will call mine my_recv() because I will use this function else where for socket connection. {
volatile unsigned int IIR;
IIR = USART1->SR;
if (IIR & USART_FLAG_RXNE) // read interrupt
{
USART1->SR &= ~USART_FLAG_RXNE; // clear interrupt
receiveWriteBuffer->buffer.buffer[receiveWriteBuffer->buffer.writeAt] = (USART1->DR & 0x1FF);
receiveWriteBuffer->buffer.writeAt++;
if(receiveWriteBuffer->buffer.writeAt == receiveWriteBuffer->buffer.size)
{
LinkedReadWriteBuffer* tmpBuff;
tmpBuff = (LinkedReadWriteBuffer*) malloc(sizeof(LinkedReadWriteBuffer) ) ;
if(!tmpBuff)
{
HardFault_Handler();
}
tmpBuff->buffer.size = READ_BUFF_SIZE;
if(!tmpBuff->buffer.size)
{
HardFault_Handler();
}
tmpBuff->next = 0 ;
initRWBuff(&(tmpBuff->buffer));
receiveWriteBuffer->next = tmpBuff;
receiveWriteBuffer = tmpBuff;
}
}
}
here is what it looks like:
int jm_recv(void* uart, unsigned char * buff, int size)
{
int i=0;
for(;i<size && receiveReadBuffer->buffer.readAt < receiveReadBuffer->buffer.writeAt;i++)
{
buff[i] = (char) receiveReadBuffer->buffer.buffer[receiveReadBuffer->buffer.readAt];
receiveReadBuffer->buffer.readAt++;
if(receiveReadBuffer->buffer.readAt == receiveReadBuffer->buffer.size)
{
if(receiveReadBuffer->next)
{
LinkedReadWriteBuffer* p = receiveReadBuffer;
receiveReadBuffer = receiveReadBuffer->next;
free(p->buffer.buffer);
free(p);
}
}
}
return i;
}
if you want o wrap SendByte with a similar signature. here what I did.
int jm_send(void * param, unsigned char * buff, int size)
{
int i;
for(i=0;i<size;i++)
{
while (!(USART1->SR & USART_FLAG_TXE));
USART1->DR = ((buff[i]) & 0xFF);
}
return size;
}
I warped these this way because I will be using them with polarssl {
int i;
for(i=0;i<size;i++)
{
while (!(USART1->SR & USART_FLAG_TXE));
USART1->DR = ((buff[i]) & 0xFF);
}
return size;
}
now for simple error handling we just need to override the error functions we want to handle. similar to our IRQ. I simply Added this under the main.
void HardFault_Handler(void)
{
int error = 0;
while(1);
}
Eventually I will make it reboot the device. a few more error functions you can override are
DCD HardFault_Handler ; Hard Fault Handler
DCD MemManage_Handler ; MPU Fault Handler
DCD BusFault_Handler ; Bus Fault Handler
DCD UsageFault_Handler ; Usage Fault Handler
You can see the list in STM32F10x.s
Finlay you might want a larger stack then the default. the stm32 Discovery has 92kb of ram. I set my stack to half of that. Open up STM32F10x.s and click the Configuration Wizard at the bottom. open the stack Configuration and increase the Stack size. I set mine to 0x14000.
The next post will cover using the usart to connect to a pc that will then connect to the internet. I will also suggest other ways to connect to the internet with out the PC
Monday, January 24, 2011
STM32 Discovery: The Basics - Echo the serial port (USART)
This is a continuing of my first post. In this post I will build on what we had in the first one and get the ARM STM32 to echo what we send over the terminal with serial.
The first step is to configure the usart. Open STM32_Init.c with the configuration wizard. I will write on how to do it in C when I cover getting started with GCC. Enable your USART1 and set the parameters. Also enable USAT1 interrupts on RXNE (receive) that way we don't need to poll the data and we will be notified when a byte has arrived.
 Once every thing is configured to your liking, hit save. Now we will be able to use the structure called USART1. Here are a few notes on members that are used allot.
USART1->SR this contains information about the interrupt that was generated
USART1->DR this contains the byte that we received or that will will write
if you assign USART1->DR a value, it will send that value out the usart. If you get the value form USART1->DR, if will read the value received from the usart.
Next, open you need to open main.c. In this file we will add the function definition for void USART1_IRQHandler (void). This function was declared STM32F10x.s and was all ready mapped to an interrupt vector. So all we need to do is enable the interrupt (which we all ready did in the configuration wizard) and override it.
My function will look a little bit like this.
We will of course need to define SendByte. The prototype will be void SendByte(int byte);
My definition will look something like this.
Now you simply need to connect PA10 to RX and PA9 to TX on your hardware. I used the FTDI chip on my arduino to accomplish this. I simply connected PA10 to RX and PA9 to TX of my arduino and took the avr out. After that what ever you send over to the terminal will echo back to you. If you need a terminal program, I used Termite
You can download the project form my Code Project article
The first step is to configure the usart. Open STM32_Init.c with the configuration wizard. I will write on how to do it in C when I cover getting started with GCC. Enable your USART1 and set the parameters. Also enable USAT1 interrupts on RXNE (receive) that way we don't need to poll the data and we will be notified when a byte has arrived.

USART1->SR this contains information about the interrupt that was generated
USART1->DR this contains the byte that we received or that will will write
if you assign USART1->DR a value, it will send that value out the usart. If you get the value form USART1->DR, if will read the value received from the usart.
Next, open you need to open main.c. In this file we will add the function definition for void USART1_IRQHandler (void). This function was declared STM32F10x.s and was all ready mapped to an interrupt vector. So all we need to do is enable the interrupt (which we all ready did in the configuration wizard) and override it.
My function will look a little bit like this.
void USART1_IRQHandler (void)
{
volatile unsigned int vsr;
{
volatile unsigned int vsr;
int ByteSent;
vsr= USART1->SR;
if (vsr& USART_FLAG_RXNE) // did we interrupt on the read
{
vsr= USART1->SR;
if (vsr& USART_FLAG_RXNE) // did we interrupt on the read
{
// clear the interrupt since we are processing it
USART1->SR &= ~(USART_FLAG_RXNE);
ByteSent = (USART1->DR & 0x1FF);
USART1->SR &= ~(USART_FLAG_RXNE);
ByteSent = (USART1->DR & 0x1FF);
SendByte(ByteSent);
}
}
}
We will of course need to define SendByte. The prototype will be void SendByte(int byte);
My definition will look something like this.
void SendByte (int byte)
{
//Wait for the uart to finish sending the byte.
while (!(USART1->SR & USART_FLAG_TXE));
USART1->DR = (byte & 0xFF);
}
{
//Wait for the uart to finish sending the byte.
while (!(USART1->SR & USART_FLAG_TXE));
USART1->DR = (byte & 0xFF);
}
Now you simply need to connect PA10 to RX and PA9 to TX on your hardware. I used the FTDI chip on my arduino to accomplish this. I simply connected PA10 to RX and PA9 to TX of my arduino and took the avr out. After that what ever you send over to the terminal will echo back to you. If you need a terminal program, I used Termite
You can download the project form my Code Project article
Wednesday, January 19, 2011
STM32 Discovery: The Basics - Creating a project
In this post I will be discussing how I got the stm32 discovery board working with the Keil IDE. This was my first time using an ARM processor, so I decided to go with a commercial grade IDE since they tend to be easier to use. As I switch over to GCC I will document that process as well.
For starters you need the STM32 discovery board
check it out at mouser
Also you will need the Keil IDE. You can download a free limited to 32kb program space version here
First off you need to create a new project and select the processor in the ST Micro section
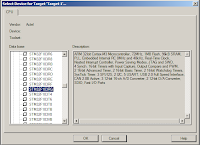
It will then ask you if you want to Copy STM32 Start up Code to the Project Folder. Choose yes. I would then recommend you use the Keil STM32_init files. I found them in a example code. It can be found here
Once you have downloaded the files, unzip it. Copy over the following files to the same folder as the project file.
STM32_Init.c
STM32_Init.h
STM32_Reg.h
Now add STM32_Init.c to your project. Right click on the Source Group 1 and click add file to group. You can group them however you want, it doesn't change how any thing builds.
Also, to keep things clean we will create a Bin folder. So we make a new directory in the same folder as our project. Next, right click on the Target folder and click options for target.
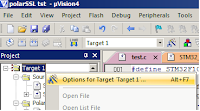
Then click output and click Select Folder for Objects and go find our bin folder that we created.
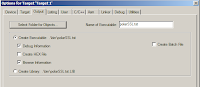
Finally, create and add a file (lets call it main.c). In there, add a main function that will call the Init code and include the init file. You might also want to include the STM32 lib file.
#include<stm32f10x_lib.h>
#include "STM32_Init.h"
int main (void)
{
stm32_Init();
return 0;
}
Now we need to set up our debugging environment for the STM32 Discovery. First we need to choose our debugger. So right click on the project and click options for target and head to the debug tab. Next, you don't want to be running a simulator so we will click the Use: radio button to the right half. in the drop down we will choose the ST-Link Debugger. Then you need to click setting and choose SWD. finally I like to have run to main() check so that is stops at the main before running.

Next we need to define the flashing tool to upload your program to the STM32. So head over to the Utilities tab and select the "Use Target Driver for Flash programming" radio button. Then you can choose the ST-Link Debugger from the drop down.

Now you are all ready to debug. In my next entry I will be making code to echo a terminal with The STM32 USART.
You can download the project form my Code Project article
For starters you need the STM32 discovery board
check it out at mouser
Also you will need the Keil IDE. You can download a free limited to 32kb program space version here
First off you need to create a new project and select the processor in the ST Micro section

It will then ask you if you want to Copy STM32 Start up Code to the Project Folder. Choose yes. I would then recommend you use the Keil STM32_init files. I found them in a example code. It can be found here
Once you have downloaded the files, unzip it. Copy over the following files to the same folder as the project file.
STM32_Init.c
STM32_Init.h
STM32_Reg.h
Now add STM32_Init.c to your project. Right click on the Source Group 1 and click add file to group. You can group them however you want, it doesn't change how any thing builds.
Also, to keep things clean we will create a Bin folder. So we make a new directory in the same folder as our project. Next, right click on the Target folder and click options for target.

Then click output and click Select Folder for Objects and go find our bin folder that we created.

Finally, create and add a file (lets call it main.c). In there, add a main function that will call the Init code and include the init file. You might also want to include the STM32 lib file.
#include
#include "STM32_Init.h"
int main (void)
{
return 0;
}
Now we need to set up our debugging environment for the STM32 Discovery. First we need to choose our debugger. So right click on the project and click options for target and head to the debug tab. Next, you don't want to be running a simulator so we will click the Use: radio button to the right half. in the drop down we will choose the ST-Link Debugger. Then you need to click setting and choose SWD. finally I like to have run to main() check so that is stops at the main before running.

Next we need to define the flashing tool to upload your program to the STM32. So head over to the Utilities tab and select the "Use Target Driver for Flash programming" radio button. Then you can choose the ST-Link Debugger from the drop down.

Subscribe to:
Posts (Atom)